

how to photoshop tattoos on yourself
How to give yourself a tattoo using Photoshop
So much of all our imagery work is 'faked' today, that we have mostly gotten to the point where we don't even call it fake anymore. The 'real or Photoshop' sites and contests that were once hugely popular, now seem so 2005.
Discover 10 3D tattoos that will blow your mind
Being able to create just about any visual you want is a great ability. Especially when we use it in ways that are more subtle, such as creating imagery that could possibly be real, but just happens not to be. A fake (or faux for the sophisticates reading) tattoo is one such example. If done well, it should look just as real as any real tattoo.
And as we have all seen, a tattoo can add a great deal of visual interest to an otherwise more average photograph. Tattoos have gone in and out of fashion over the years, but have come back with a vengeance in the last decade, making inroads into society like never before. And getting more media coverage, including TV shows like Inked.
For we visual artists wanting to create great images, tats are eye-catching, and can also be seen as very sexy — for either gender. Adding them to our photos can be referred to as 'schtick', a Yiddish word that can roughly mean gimmick. I'm fine with this, as creating effects-images is all about combining many-many visual gimmicks. A fake tattoo can be a powerful gimmick.
Why faux tats are easy
Look at some photos of people with real tattoos. What you might realize is that most of them actually look pretty fake. Yes, even REAL ones.
What I mean is that a tattoo isn't a natural part of the human anatomy. So it is, at its core, fake. So when we look at a photo, we see this 'fake' created by a tattoo artist. The tattoos we add will simply be created by us, digital artists. In either case it's fake, and the brain has to do a bit of its suspension of reality thing to accept it in either case. All this makes our job easier.
Another thing that makes our job easier is that our brains allow tremendous latitude as to how a tattoo sits on a human body. Again, this is because tats are not real in themselves, and normal physics don't apply to them, at least not strictly.
For example, say you placed a photo of a chair into a photo of a room. The scale, perspective, vanishing points and other criteria would all need to be fairly spot-on for it to "read" as real. Not too much of that applies too strictly to a tattoo, as even real tats are inked in all sorts of odd and creative ways. And visually, we have learned to accept all of it as real.
How to faux
There are really a few ways to go about adding a fake tat to a body. The thing about doing a fake tat is that it can be done either easily, or more complexly, depending on the image and accuracy needed. We will look at all of them. But the first step is selection and prep.
01. Selection
Depending on how creative and hands on you want to be, perhaps you will actually design the tattoo yourself. Or perhaps you are doing this job for a tattoo designer and they provide the art.
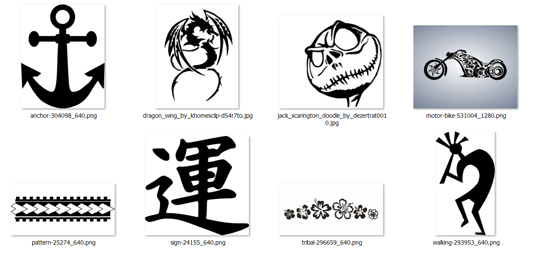
In our case, we are taking the expedient route of doing a Google search and setting our search criteria for art 'Labeled for reuse with modification'. We found a decent selection, many from a favorite free image resource, Pixabay.
02. Prep
Preparing the art we found for tattooing is simple enough for any first year graphics person. We want to make sure they are high enough resolution, but we have some latitude here because tats are rarely super-sharp. So up-sizing is very doable. Just make sure the edges don't have jaggies.
It would be nice if the image was alpha channeled or masked, but we'll be setting the Layer Blend to Multiply anyway, so this isn't critical.
A bit more graphics work can open your options to non B&W images. For example, the image of the motorcycle will need the greyscale background removed, an easy task. But don't stop there, as any design can be modified and enhanced in many interesting ways to better suite your needs.
03. Example A — A simple overlay
The easiest way to create a tattoo is to just overlay the art over the image, using the Multiply blending mode. If the body being tattooed is mostly flat, then the effect should work rather well.
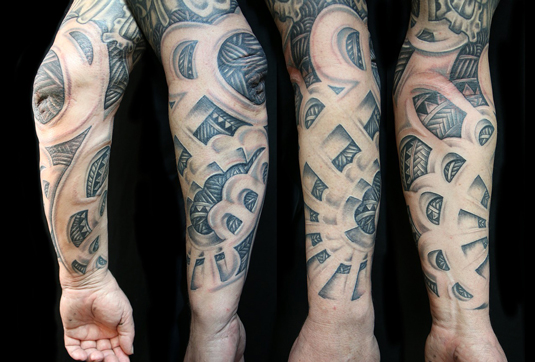
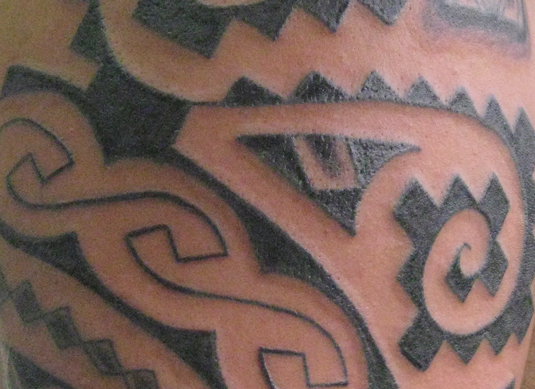
But even in a simple overlay job, we need to do more work to make it fly. Tattoos are never perfect appliques. The process of inking often does some damage to the skin, which you can see in the following photos, resulting in some skin discoloration. And unless the inking is very recent, the intensity of the inks tend to fade rather quickly. It will often also leach some ink into the outer skin.
Getting some of those effects means playing with a bunch of filters in Photoshop until you hit on what works for YOUR IMAGE. For example, to make the edges less perfect I selected the tattoo's outline and saved it to a channel. I then ran the Filter> Filter Gallery > Spatter filter on it. I then used this alpha to create a new tattoo payer.

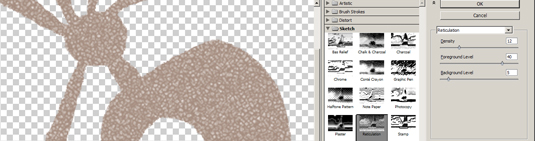
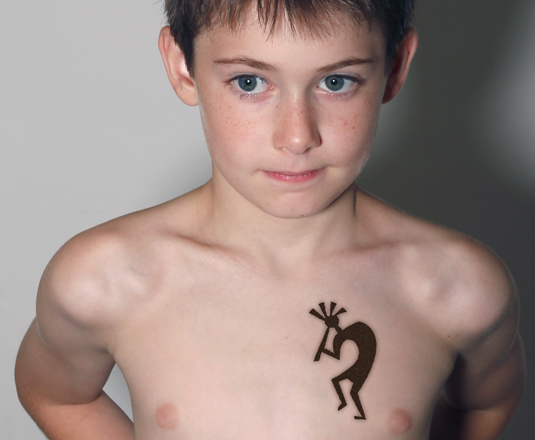
The adorable young boy in this sample below (my son) has none of the skin texture we would see in older folks. So I added a bit of texture to the tat by duplicating the layer and applying the Reticulation filter which created a skin-like pattern. I put this under the main tattoo layer (set to Normal blend), increased its contrast with Levels, and adjusted the main layer's opacity to taste.
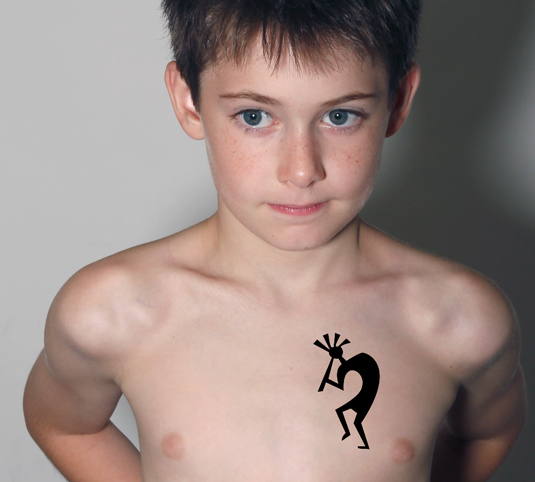
I also added a touch of reticulation to the entire skin by copying the photo, applying the filter, and laying it over the original layer set to Soft Light blend mode with a 30 per cent opacity. Continuity of the skin texture helps bring the photo and tat together.
The edges of tats need to have some smear effect, which I added in two steps. First with a small amount of Gaussian Blur (0.5), and second with a touch of Outer Glow, using a darker warm color.
There is more that could be done. For example, tats tend to have a bit of a sheen to them. So they pick up opportunities for specular highlights. This isn't very available in this example, so I didn't add any. Here is a work-in-progress sample of the above image:
04. Example B – 2D distortions
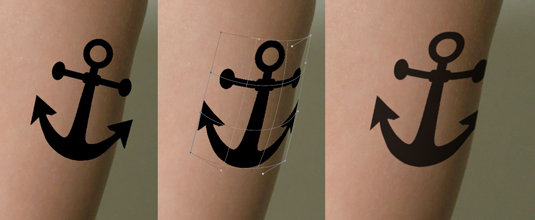
It's nice when a project is straightforward like our last example. But tattoos don't always sit on flat surfaces. What do you do when they are curing around arms and shoulder blades? You distort the tattoo image, of course.
There are a few ways to do this in Photoshop. These options include the various Distortion tools, like those found in Transform, like Warp, Perspective and Scale.
Photoshop also offers other creative ways to distort your tattoo art to fit the human anatomy. This includes the Smudge (aka Finger) tool, Liquify, and the very powerful Puppet Warp set of controls.
05. Example C—3D Distortions
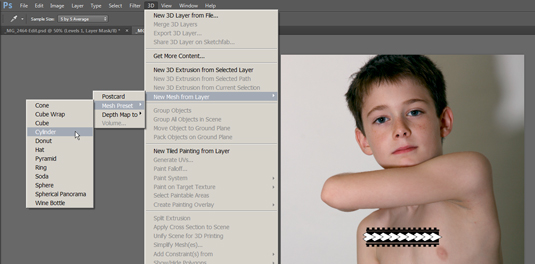
There will be times that the effects you are looking for are hard to accomplish in 2D and are best created in 3D. This can be done by creating some 3D mesh that approximates the shape of the anatomy to receive the tattoo. While a standalone 3D program will offer the most control in this effort, Photoshop has a good range of 3D tools to solve many issues.
In this last example I added art for a tribal band style of tattoo, and converted it to a 3D cylinder shape, as seen in the image.
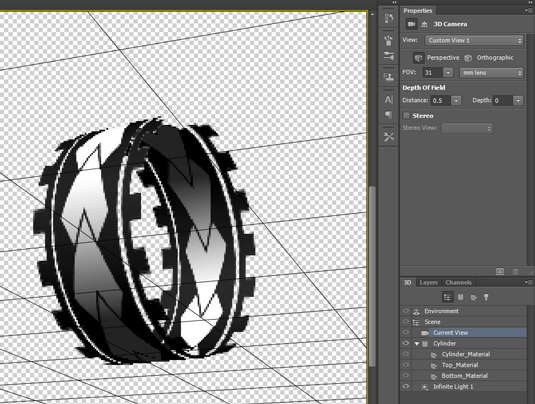
A bit of finessing is always needed in any 3D work, as was needed here. But it's nice to know its available if other solutions won't work. (Note that this was actually produced in an older version of Photoshop). One image I did this on even became that model's most talked about image in her portfolio. (Though the lack of tats on her other images confused some of her potential clients to no end.)
Words: Lance Evans
Lance Evans is creative director of Graphlink Media.
Like this? Read these!
- The designer's guide to working from home
- 40 free tattoo fonts for your body art
- Free graphic design software available to you right now!
The Creative Bloq team is made up of a group of design fans, and has changed and evolved since Creative Bloq began over a decade ago. The current website team consists of five people: Editor Kerrie Hughes (currently on maternity leave), Acting Editor Rosie Hilder, Deals Editor Beren Neale, Senior News Editor Daniel Piper, and Staff Writer Amelia Bamsey. The 3D World and ImagineFX magazine teams also pitch in, ensuring that content from 3D World and ImagineFX is represented on Creative Bloq.
Related articles
how to photoshop tattoos on yourself
Source: https://www.creativebloq.com/photoshop/how-give-yourself-tattoo-using-photoshop-81516339
Posted by: freyfacharnmethe.blogspot.com
0 Response to "how to photoshop tattoos on yourself"
Post a Comment